Duck DNS Website
Dang
- Hack 1
- Hacks 2
- Hack 3 (Not doing)
- Hack 4
- Hack 5
- Hacks 6
- KASM Hacks
- KASM Team Work
- AWS Database Quizzes
- Certbot hacks
Hack 1
Pros of Duck DNS:
- Its free, and allows you to access domain services that allow users to assign a domain name specific to their website.
- Access a device using a specific host name. Convenient as opposed to a port or other host name
- Can use HTTPS or other form of hashing algorithm in order to protect data
- Domain names can be custom in order to make stuff more accessible
Cons of Duck DNS:
- Not suitable for larger projects, or maybe unable to be scaled.
- Depends on the connection of the device to the domain service, no direct connection in a way like ethernet or other form of connection

Hacks 2
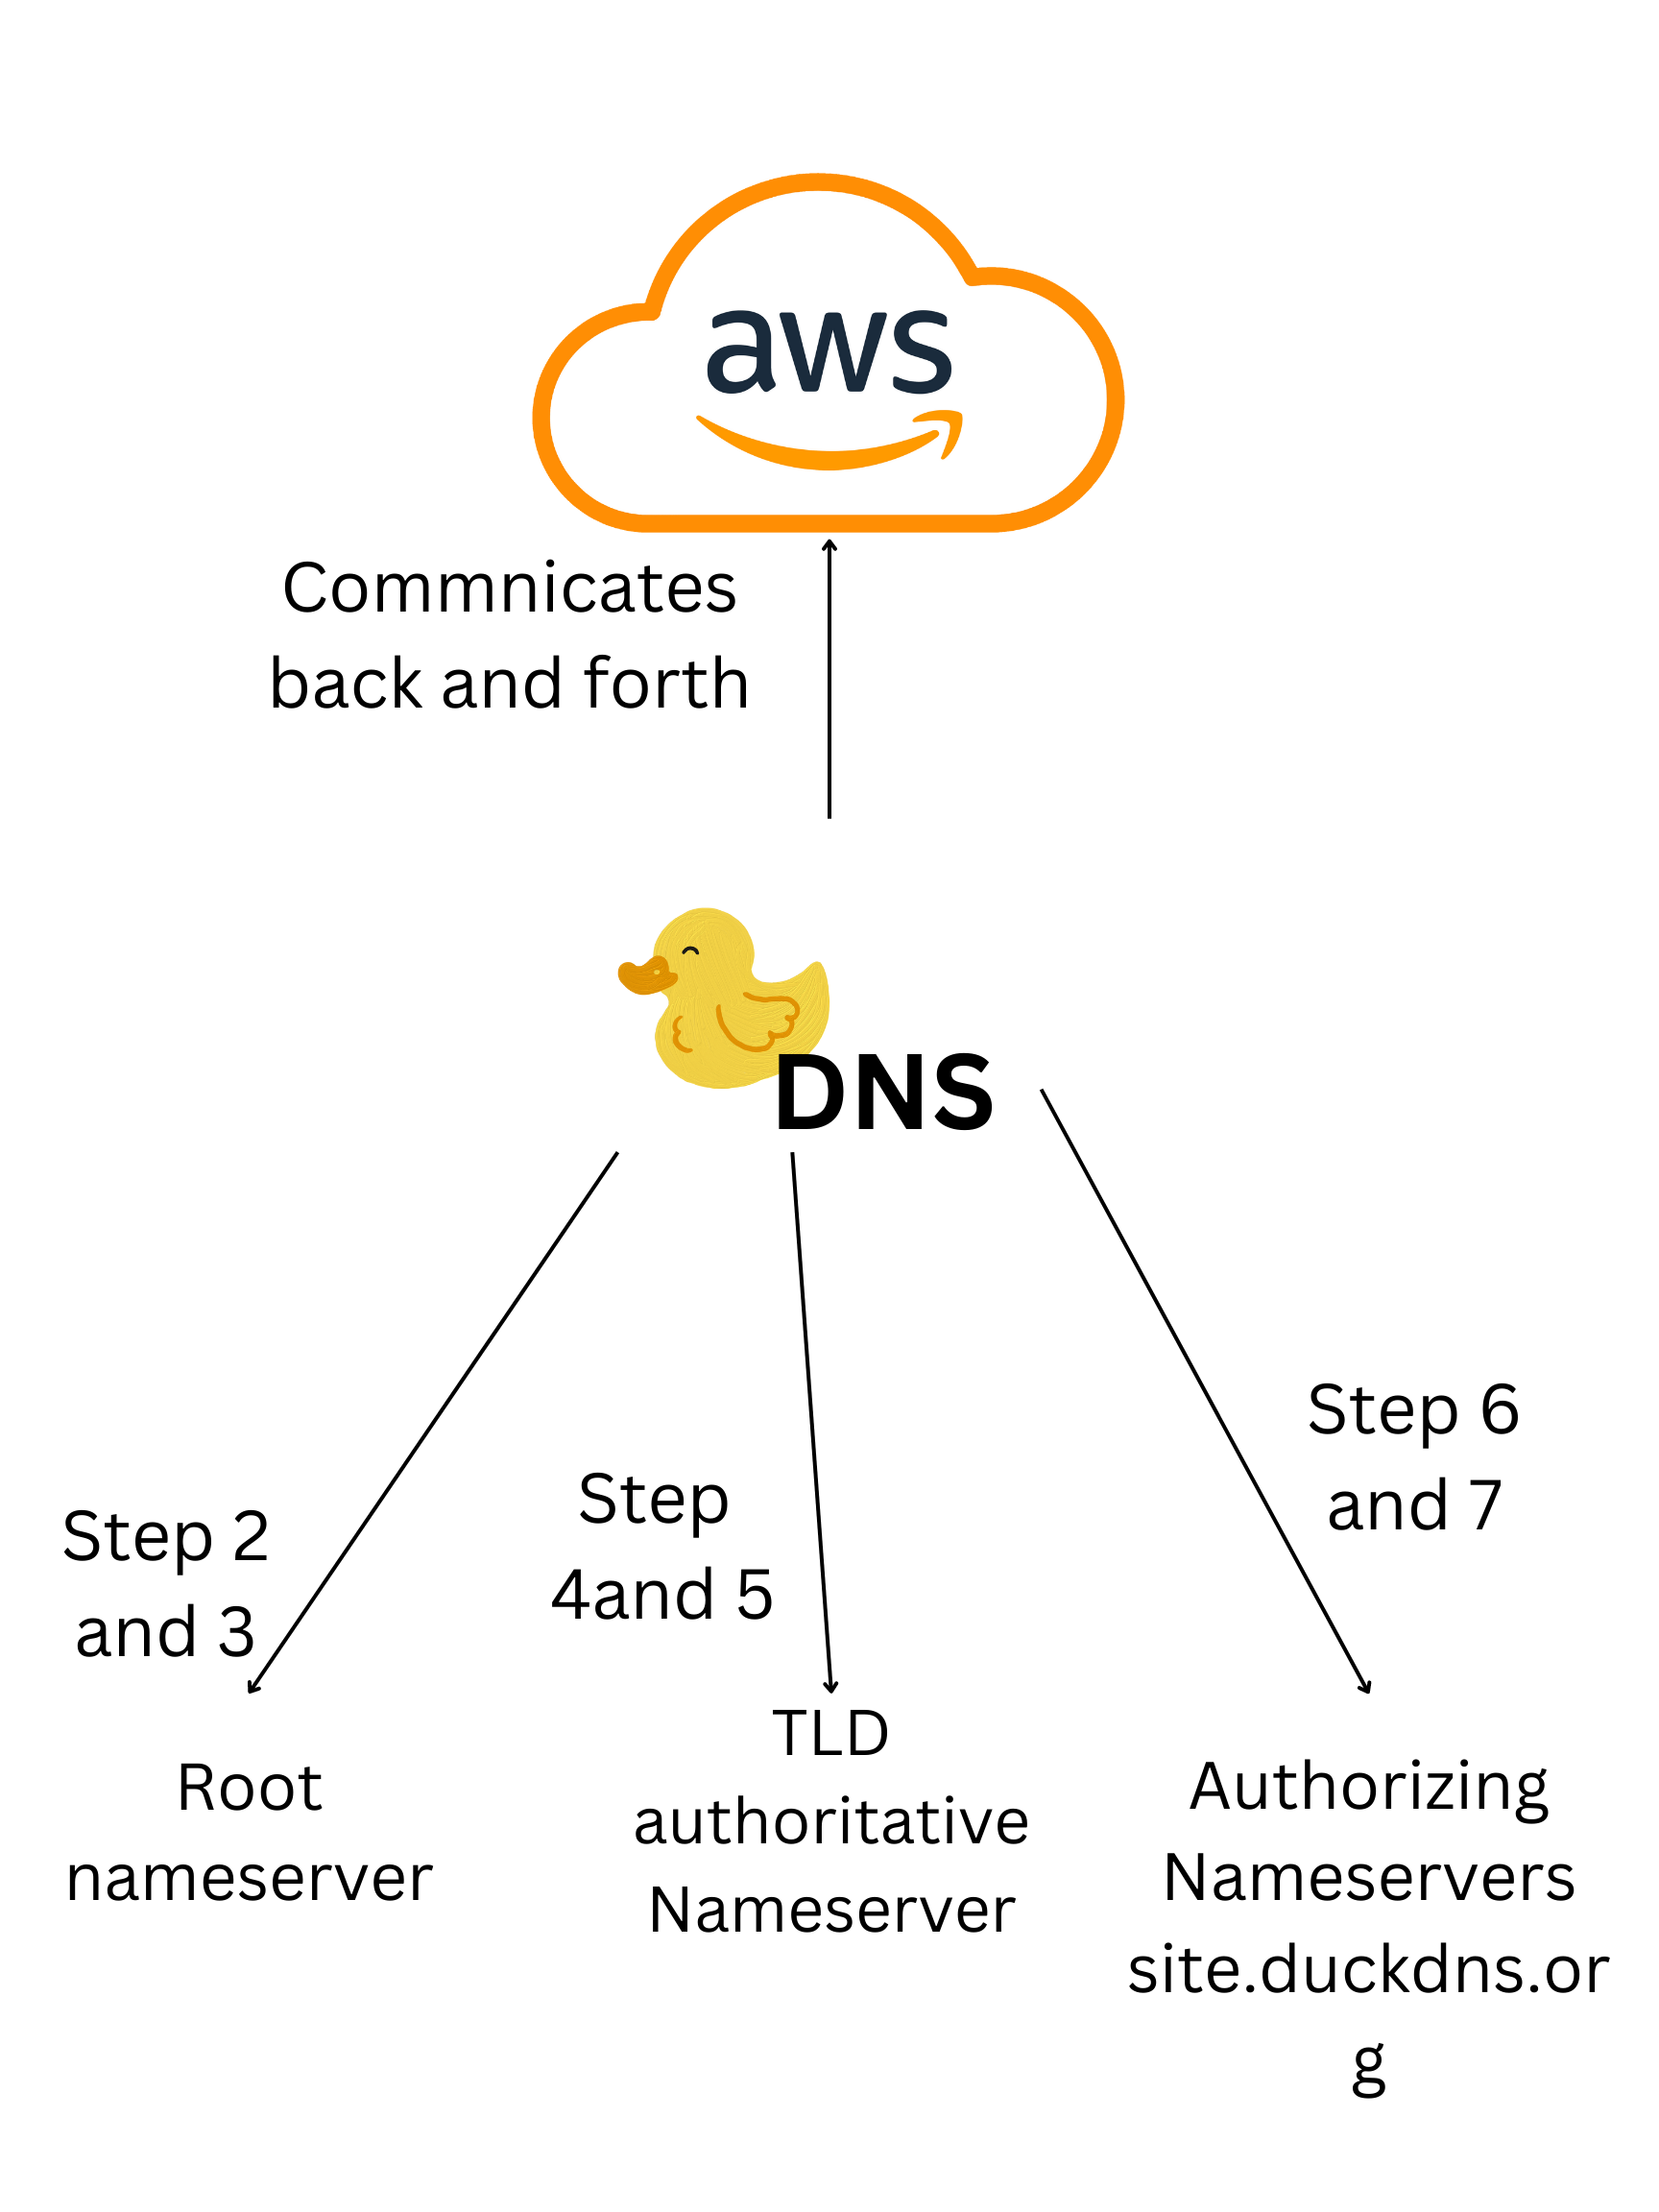
We use a DNS in order to host our flask projects on a local server in order to make sure that those who are on the internet can access our flask pages. DuckDNS takes our flask and hosts it on a local server stored in a server room elsewhere int eh world, sharing our information from our device and our AWS container to that server which attaches our hosted version to a different port, under a different name, thus allowing it to be hosted. To setup using duck DNS, we have to (1) Sign in with your DuckDNS account by selecting “Sign in with Github” (2) Then create a subdomain using (3) Change the IP address to the one you would like to link to(4) Click the IP address button and link to your subdomain.
Hack 3 (Not doing)
Hack 4
I do not currently have any confusions regarding deployment. I found the process rather intuitive, and really the commands to be the primary issues. Mainly outdated and conflicting dependencies as a result of there being numerous people on the same instance. Also, there are some issues with the number of internet connections that need to occur in order to reach,a dn there are also issues with the idea of PUSD internet interfering with the process. Many of the issues we see really do happen because there aren’t necessarily fixes we see online. These are extreme corner cases that we come upon by sheer coincidence.
Hack 5

Hacks 6
Hello, varalu running /Users/vn1/home/anaconda3/bin/python
You will be asked 11 questions.
Are you ready to take a test! Press Enter key to begin. Best of luck :)
Question 1 : What does Domain Name Server represent?
DNS is correct! Good Job!
Question 2 : What does this Represent: Amazon Web Services, which is a cloud computing platform provided by Amazon.
AWS is correct! Good Job!
Question 3 : What is the first Step to setting up an AWS Server? 1: Connecting to a Ubuntu EC2 Instance, 2: Start updating the system, 3: Clone the repository which one wishes to deploy, 4: Run the command: main.py to start the project
1 is correct! Good Job!
Question 4 : What is the third Step to setting up an AWS Server? 1: Connecting to a Ubuntu EC2 Instance, 2: Start updating the system, 3: Clone the repository which one wishes to deploy, 4: Run the command: main.py to start the project
3 is correct! Good Job!
Question 5 : What is the fourth Step to setting up an AWS Server? 1: Connecting to a Ubuntu EC2 Instance, 2: Start updating the system, 3: Clone the repository which one wishes to deploy, 4: Run the command: main.py to start the project
4 is correct! Good Job!
Question 6 : What is the second Step to setting up an AWS Server? 1: Connecting to a Ubuntu EC2 Instance, 2: Start updating the system, 3: Clone the repository which one wishes to deploy, 4: Run the command: main.py to start the project
2 is correct! Good Job!
Question 7 : What files are you supposed to edit after finishing the first steps of setting up the server and cloning it within the AWS Server? 1: Edit the docker files and docker.yml, 2: Edit the main.py file to change the characteristcs.
1 is correct! Good Job!
Question 8 : What is the first step to setting up a DuckDNS Server? 1: Sign in with your DuckDNS account using Github, 2: Configure current ip to the IP address that you want to access and click update ip button , 3: Create the subdomain, 4: Access site by typing in subdomain.duckdns.org
1 is correct! Good Job!
Question 9 : What is the second step to setting up a DuckDNS Server? 1: Sign in with your DuckDNS account using Github, 2: Configure current ip to the IP address that you want to access and click update ip button , 3: Create the subdomain, 4: Access site by typing in subdomain.duckdns.org
3 is correct! Good Job!
Question 10 : What is the third step to setting up a DuckDNS Server? 1: Sign in with your DuckDNS account using Github, 2: Configure current ip to the IP address that you want to access and click update ip button , 3: Create the subdomain, 4: Access site by typing in subdomain.duckdns.org
2 is correct! Good Job!
Question 11 : What is the fourth step to setting up a DuckDNS Server? 1: Sign in with your DuckDNS account using Github, 2: Configure current ip to the IP address that you want to access and click update ip button , 3: Create the subdomain, 4: Access site by typing in subdomain.duckdns.org
4 is correct! Good Job!
varalu you scored 11/11
Total Percentage: 100.00%
KASM Hacks
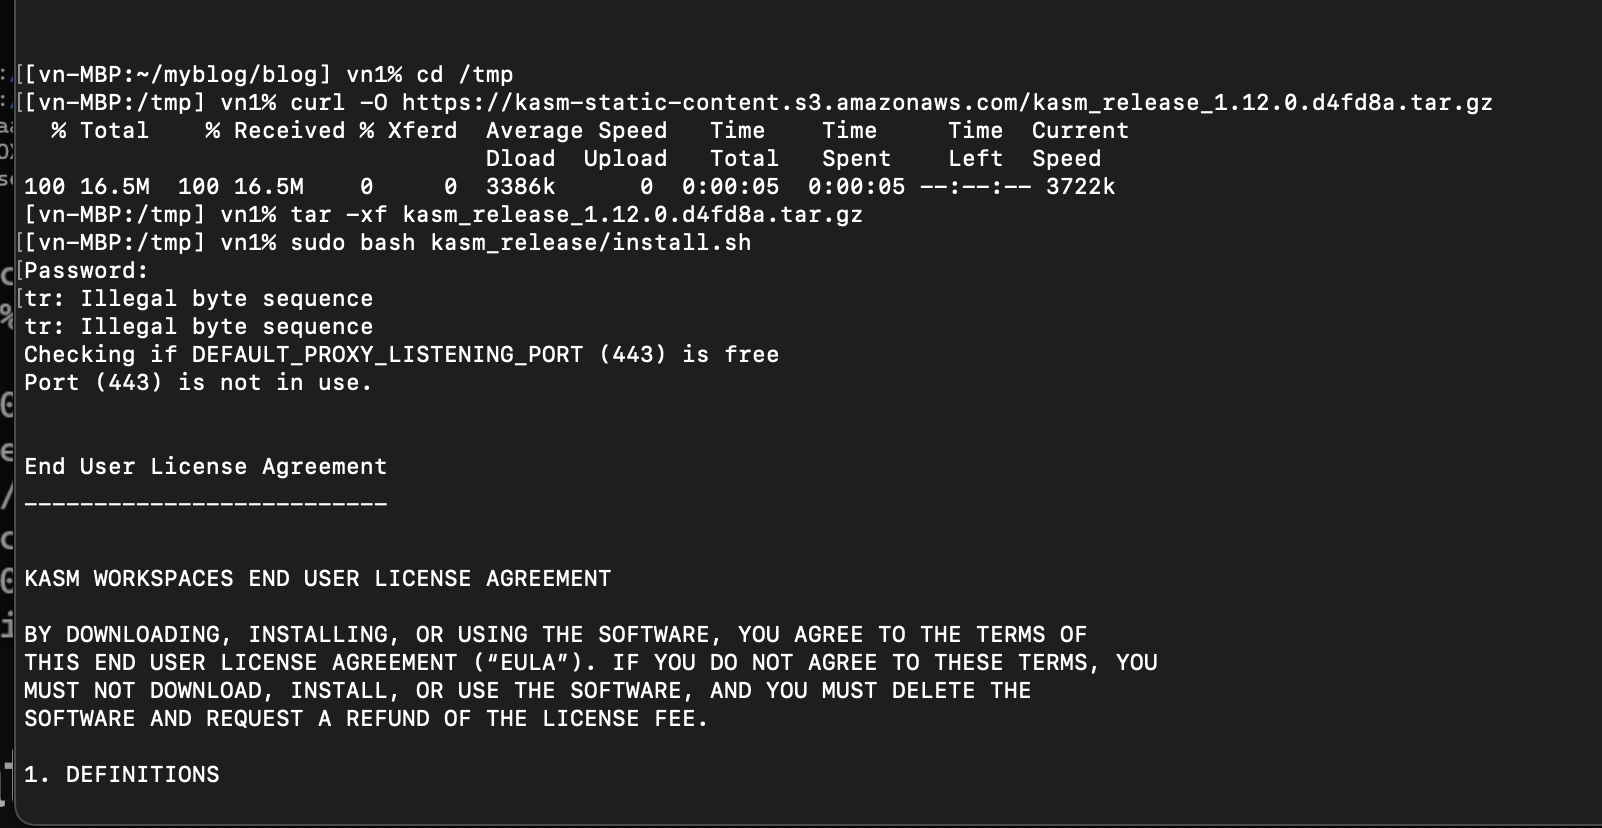
Virtual desktops and KASM (Kernel Adaptive Security Module) provide a secure environment to access data without compromising the host’s system. In an APCSP, we can use KASM to create a controlled environment with which students can contribute to code without suffering the consequences. Additionally, virtual desktops can be useful for facilitating collaboration among students and enabling remote instruction. VNCs could be used for cross-platform or long-distance collaboration, as we see with splashtop in the CTE department.
KASM Team Work

AWS Database Quizzes
Quiz 1
- C
- D
- C
Quiz 2
- C
- A
- C
Certbot hacks
Certbot Hacks 1:
I could not install the Certbot package, and thus was unable to get a screenshot of Certbot working
Certbot Hacks 2:
OpenSSL is an open-source implementation of SSL/TLS protocols that is widely used for secure communication on the Internet. It offers a range of cryptographic features, including encryption, decryption, digital signatures, and hash functions. LibreSSL, on the other hand, is a fork of OpenSSL that was created in 2014 after the discovery of the Heartbleed vulnerability. In terms of security features, both OpenSSL and LibreSSL offer similar capabilities, such as support for strong cryptographic algorithms, certificate validation, and secure key management. In March 2021, OpenSSL released a security advisory that addressed three vulnerabilities, including a high-severity flaw that could allow an attacker to perform a denial-of-service attack or execute arbitrary code on a vulnerable system.